
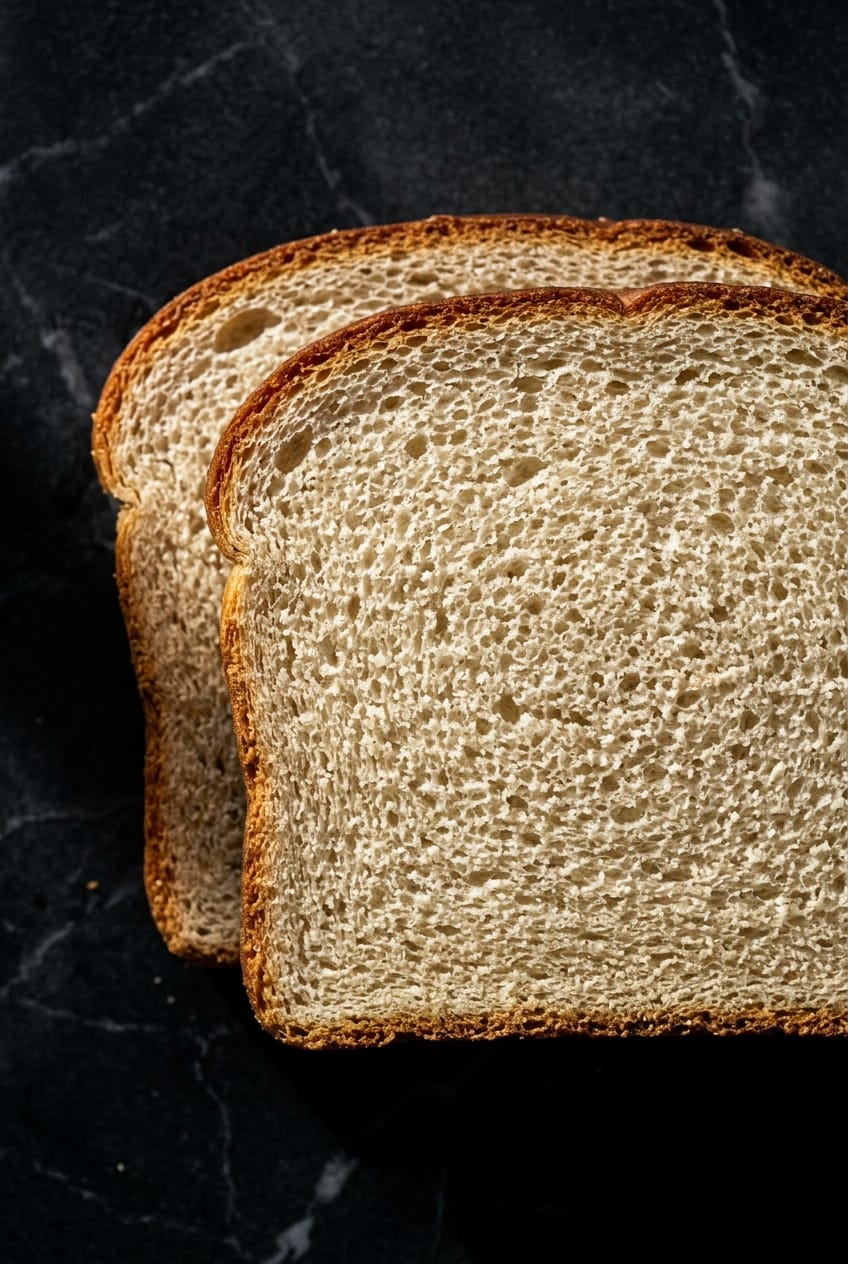
Most homemade sandwich bread fails at two moments that have nothing to do with the ingredient list: shaping and proofing. Get both right, and you get a soft, even-crumbed loaf you can actually slice thin enough for a lunchbox. You can stop searching… this is the one.
Why This Recipe Works
- Fat choice matters. Nearly every competing recipe reaches for vegetable or canola oil. This one uses melted grass-fed butter, which adds a faint richness to the crumb and a noticeably better flavor in the finished loaf. Olive oil is the alternative if you want a slightly moister crumb that holds up longer.
- Honey does everything sugar does, better. It feeds the yeast, promotes a golden crust, and adds a depth of flavor white sugar simply doesn’t have. Use a light, neutral variety like clover or acacia and you won’t taste it at all, just the result.
- The shaping step is the whole game. That hollow gap running through the center of a loaf isn’t a proofing problem. It’s a shaping problem. The tight-roll technique creates surface tension that keeps the interior structure intact all the way through the bake.
- Visual benchmarks, not timers. A 75°F kitchen and a 65°F kitchen are not the same place. This recipe tells you what to look for and what to feel for, so it works wherever you are.
- Bread flour is the right call. Its higher protein content builds the gluten structure needed for a tight, sliceable crumb. All-purpose works in a pinch, but the texture is noticeably softer and slightly less chewy.
The Only Sandwich Bread
Prep time: 25 minutes | Rise time: 2 to 2.5 hours | Bake time: 30 minutes | Makes: 1 loaf (12 slices)
Ingredients
Dough
- 3 cups (360g) bread flour, plus more for dusting
- 1 packet (2¼ teaspoon / 7g) instant yeast
- 1¼ teaspoon (7g) fine sea salt
- 1 tablespoon (21g) honey, light and neutral (clover or acacia)
- 3 tablespoon (42g) unsalted grass-fed butter, melted and slightly cooled
- 1 cup (240ml) warm water (around 110°F / 43°C)
Directions
-
Activate the yeast. Pour the warm water into a large bowl or the bowl of your stand mixer. Add the honey and stir to combine. Sprinkle the yeast over the surface and let it sit for 5 to 10 minutes, until it looks foamy and slightly puffed. If nothing happens after 10 minutes, the water was too hot or too cold, or the yeast is dead, start over.
-
Build the dough. Add the melted butter to the yeast mixture. In a separate bowl, whisk together the bread flour and salt, then add it to the wet ingredients all at once. This is the correct order: salt goes in with the flour, not directly onto the yeast.
-
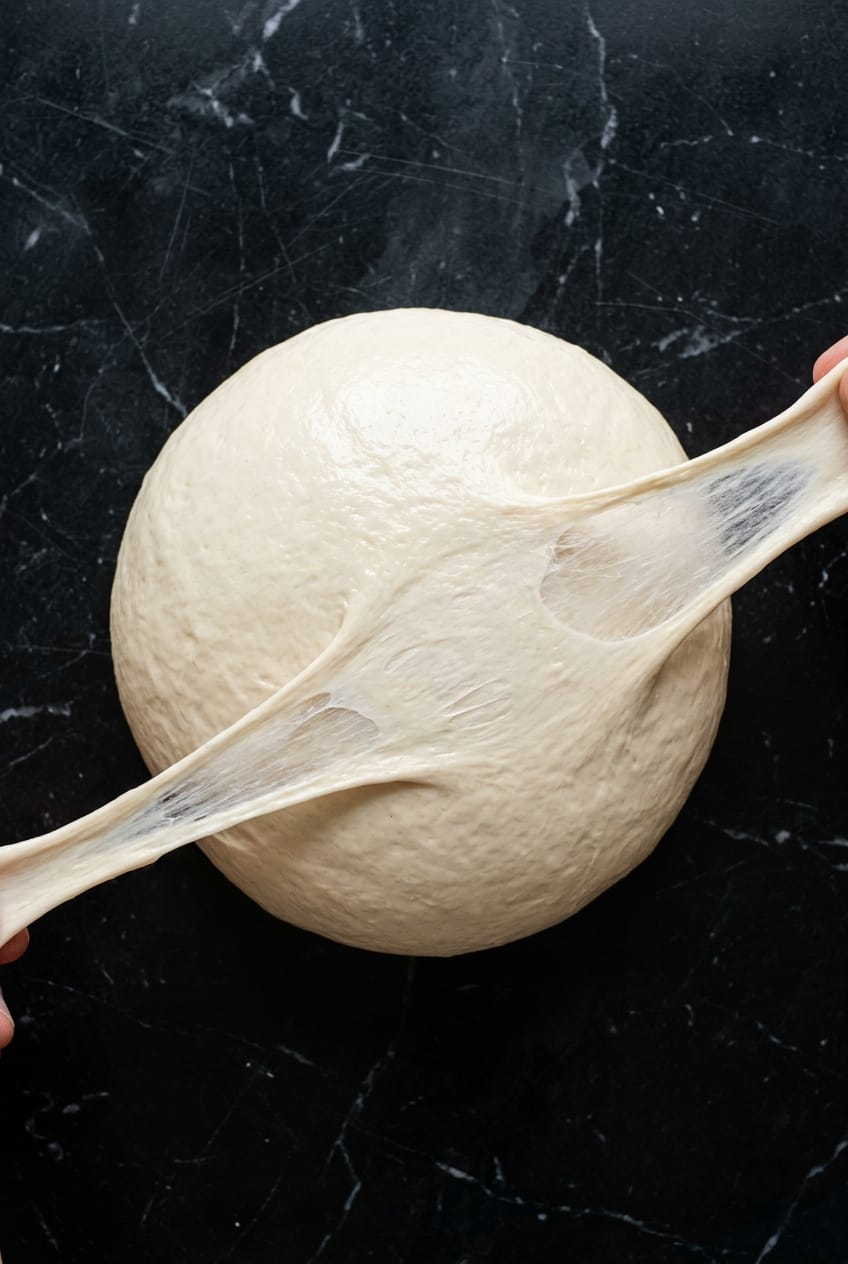
Knead until the dough changes. If using a stand mixer, attach the dough hook and knead on medium speed for 8 to 10 minutes. If mixing by hand, turn the dough out onto a lightly floured surface and knead for 10 to 12 minutes. You are done when the dough is smooth, slightly tacky but not sticky, and stretches without tearing, pull a small piece thin enough to see light through it without it breaking. That's the windowpane. What it feels like: a warm earlobe, not a rubber band.
-
First rise. Form the dough into a ball, place it in a lightly oiled bowl, and cover with plastic wrap or a damp towel. Let it rise until doubled in size, roughly 1 to 1.5 hours at room temperature. Visual check: poke the dough gently with a floured finger. It should spring back slowly and only halfway. If it springs back immediately, give it more time. If the indent stays put, it has over-proofed and you should move quickly to the next step regardless.
-
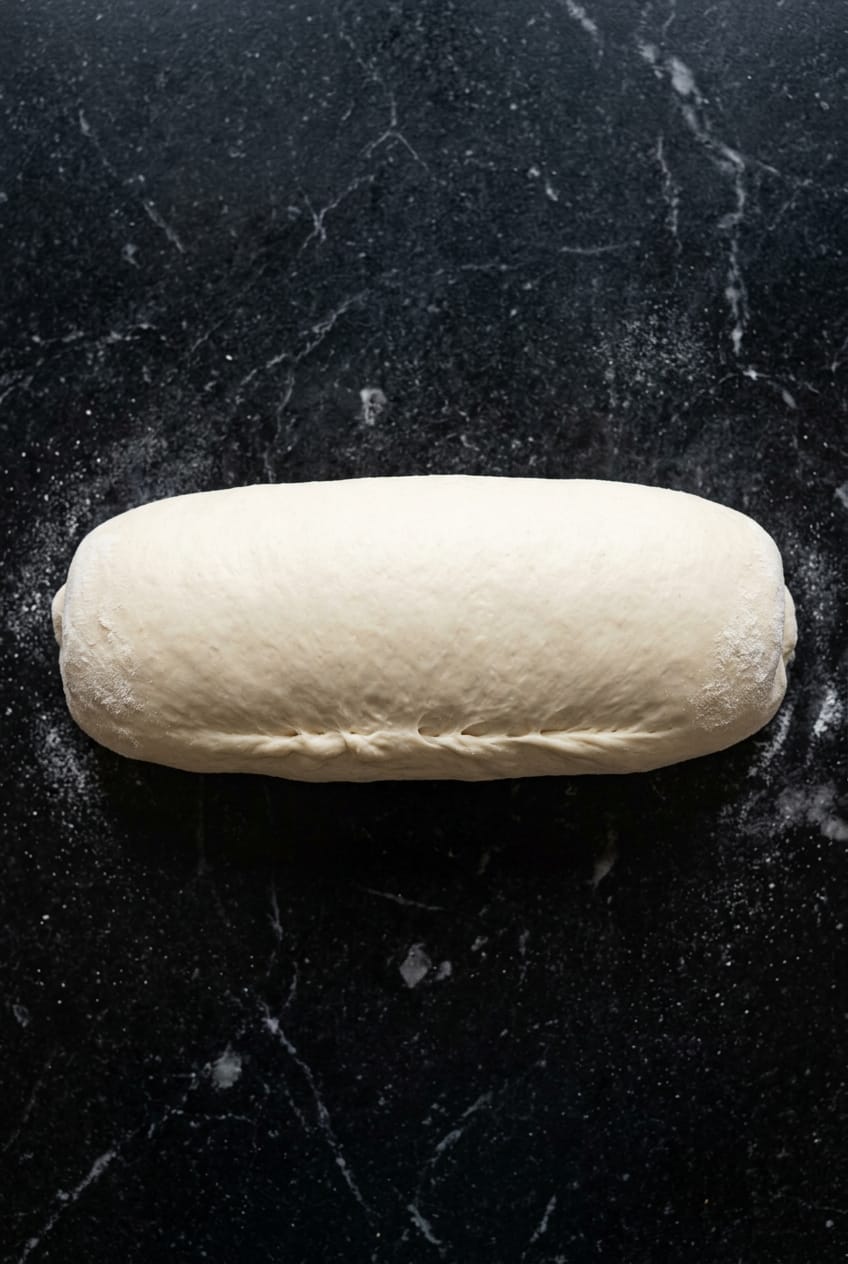
Shape the loaf. Punch the dough down and turn it out onto an unfloured surface (a little grip helps here). Flatten it into a rough rectangle about as wide as your 9×5 inch (23x13cm) loaf pan. Starting from the short edge closest to you, roll it away from you into a tight log, pressing firmly as you go and keeping the tension even across the full width. Pinch the seam closed along the bottom. This is the step that eliminates the hollow center gap, the tighter the roll, the cleaner the interior.
-
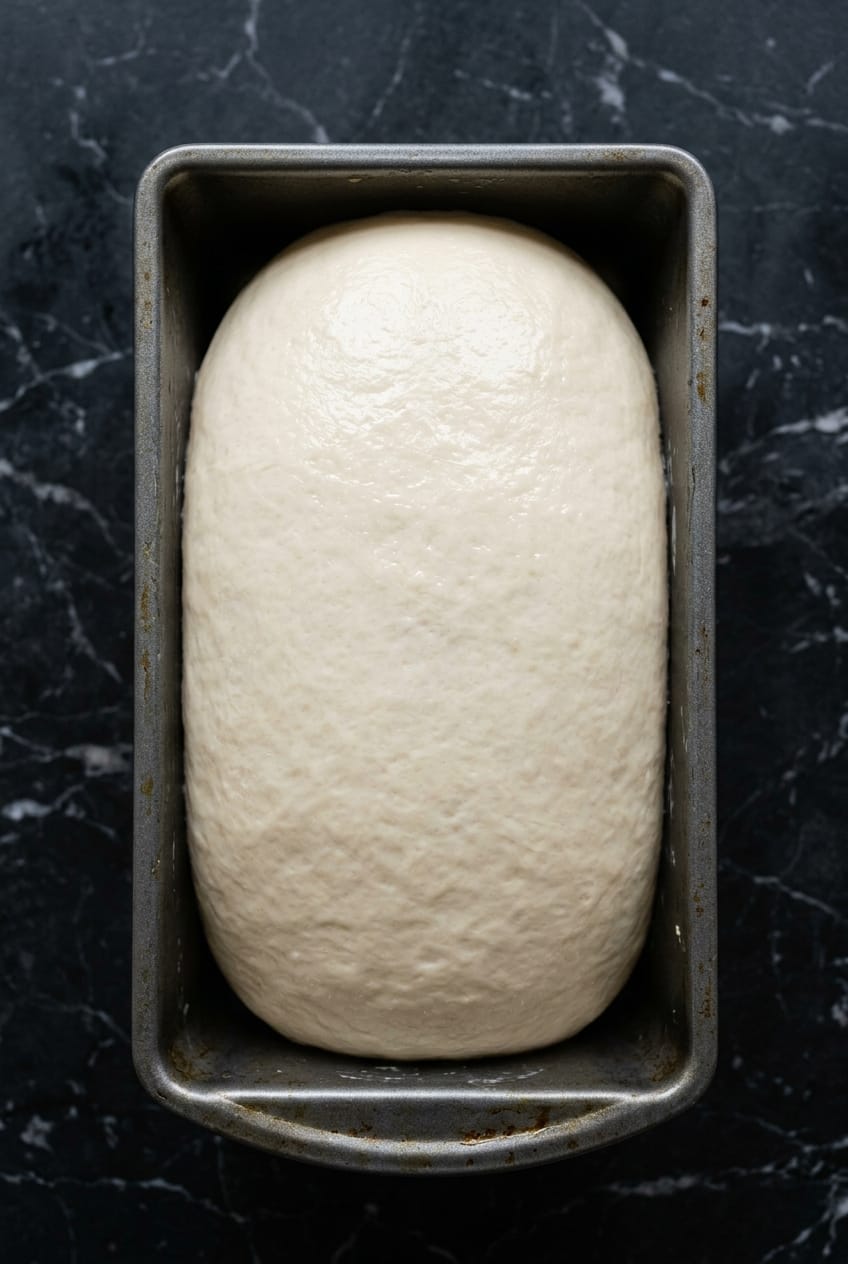
Second rise. Place the shaped loaf seam-side down into a lightly greased loaf pan. Cover loosely and let it rise until the dough crowns about 1 inch (2.5cm) above the rim of the pan, 45 minutes to 1 hour. Preheat your oven to 375°F (190°C) while it finishes rising.
-
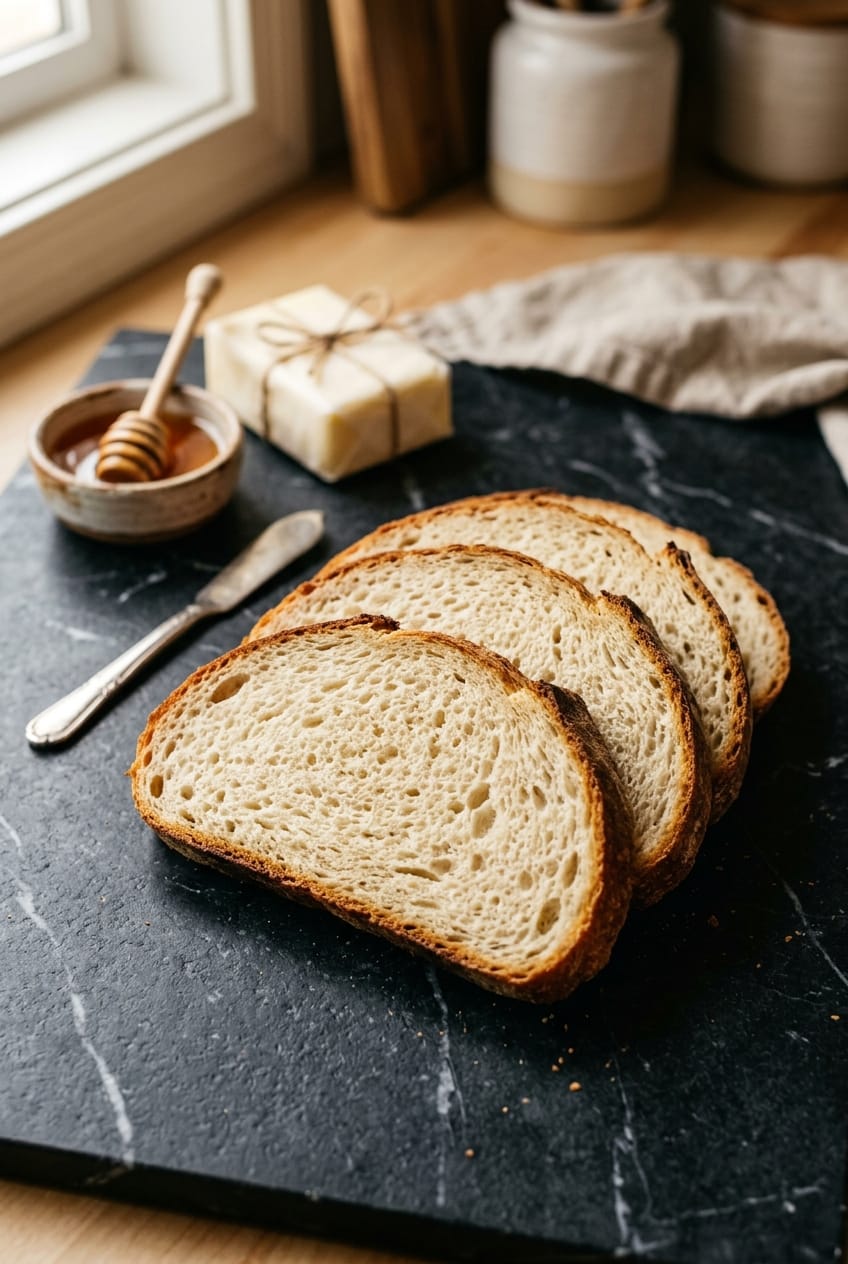
Bake. Bake on the center rack for 28 to 32 minutes, until the top is deep golden brown and the loaf sounds hollow when you tap the bottom. An internal temperature of 195 to 200°F (90 to 93°C) confirms it's done. Turn it out onto a wire rack immediately and let it cool for at least 45 minutes before slicing. (Cutting into a hot loaf is the other way people ruin a good crumb, the interior is still setting.)
Notes
Storage: Once fully cooled, wrap the loaf tightly in plastic wrap or store in an airtight bread bag. It keeps well at room temperature for 3 to 4 days. Do not refrigerate, it will go stale faster.
Freezing: This loaf freezes well. Slice it completely before freezing so you can pull individual slices as needed. Wrap the sliced loaf tightly in plastic wrap, then in foil or a freezer bag. It keeps for up to 3 months. To use, toast directly from frozen or let slices thaw at room temperature for 20 minutes.
Reheating: Day-old bread comes back to life in a 300°F (150°C) oven for 8 to 10 minutes, wrapped loosely in foil.
Instant vs. active dry yeast: This recipe is written for instant yeast, which goes directly into the dough without proofing. If you only have active dry yeast, use the same amount (2¼ tsp) but proof it in the warm water and honey for 10 minutes before proceeding, active dry needs that head start to activate reliably.
Olive oil instead of butter: Use 2 tablespoons (30ml) of light olive oil in place of the butter. The crumb will be slightly more open and the loaf will stay moist a day or two longer. Both are good. Butter has more flavor on day one; olive oil has better staying power.
Whole milk substitution: Swap the water for whole milk, warmed to the same temperature, for a slightly richer, softer crumb. The loaf will brown a little faster, check it at the 25-minute mark.
All-purpose flour: It works, but bread flour is worth buying. The loaf will be noticeably softer and less structured with all-purpose, fine for eating fresh, but harder to slice thin.
FAQ
Why is my homemade sandwich bread so dense?
Almost always one of two things: under-kneading or under-proofing. Under-kneaded dough hasn't developed enough gluten to hold the gas from fermentation, so the loaf collapses inward during baking. Under-proofed dough doesn't have enough air in it before it hits the oven. Use the windowpane test for kneading and the finger-poke test for proofing, both are in the directions above.
Can I make sandwich bread without a stand mixer?
Yes. Hand kneading takes 10 to 12 minutes on an unfloured surface and produces the same result. The dough should feel tacky but not sticky by the end. If it's tearing instead of stretching, keep going.
What type of flour is best for sandwich bread?
Bread flour. It has a higher protein content than all-purpose flour (around 12 to 14% versus 10 to 12%), which builds more gluten and gives you the tighter, chewier crumb that holds up to slicing and stacking. All-purpose will work but produces a softer, slightly less structured loaf.
How do I store homemade sandwich bread so it stays soft?
Wrap it tightly in plastic wrap and keep it at room temperature. Refrigerating bread actively accelerates staling because the cool temperature causes the starch to recrystallize faster. Room temperature, airtight, up to 4 days.
Can I freeze homemade sandwich bread?
Slice the whole loaf before freezing, then wrap tightly in plastic and foil. Individual slices can go straight from the freezer into the toaster. The loaf holds well for up to 3 months.


Leave a Reply