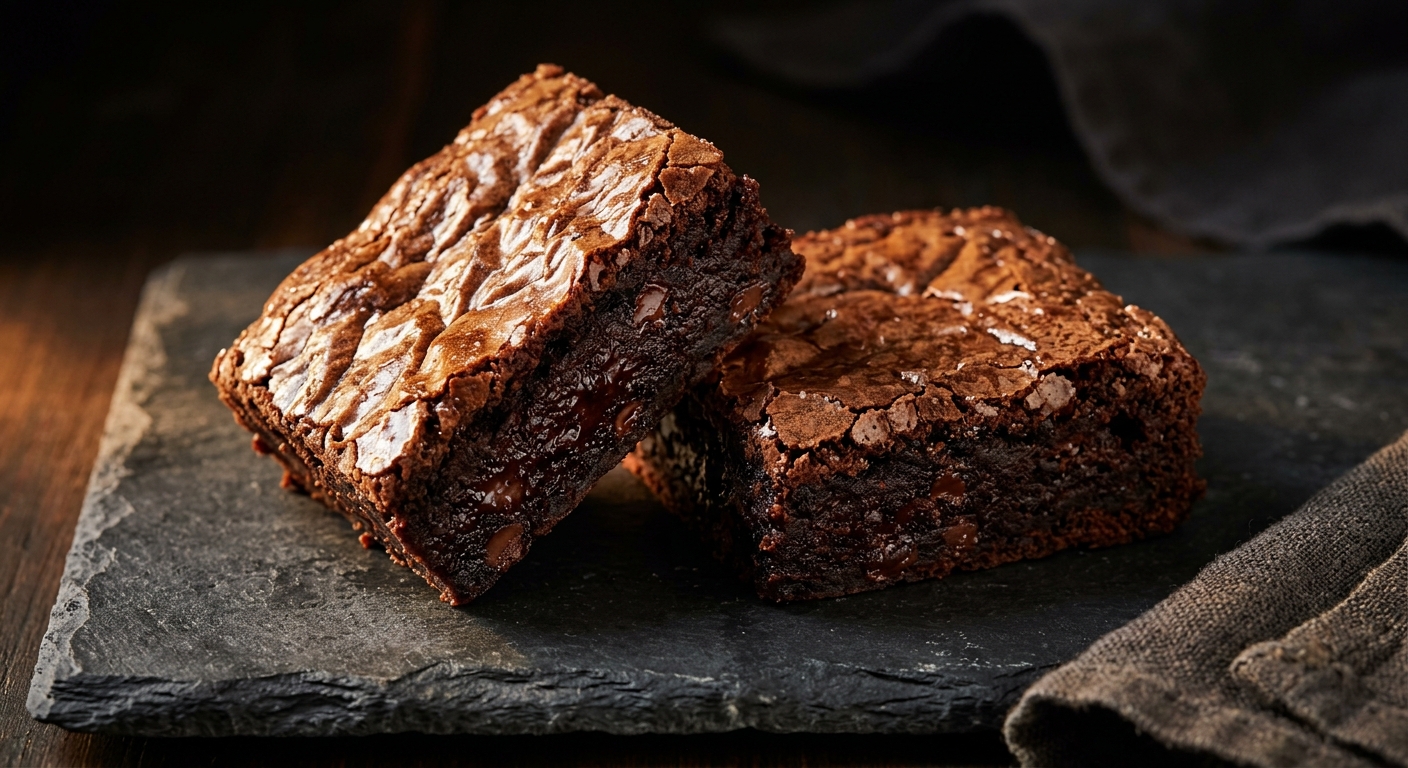
Every brownie recipe promises fudgy and delivers cakey. That happens because of three decisions made before the batter even comes together: the fat, the chocolate, and the eggs. This recipe fixes all three. You can stop searching… this is the one.
Why This Recipe Works
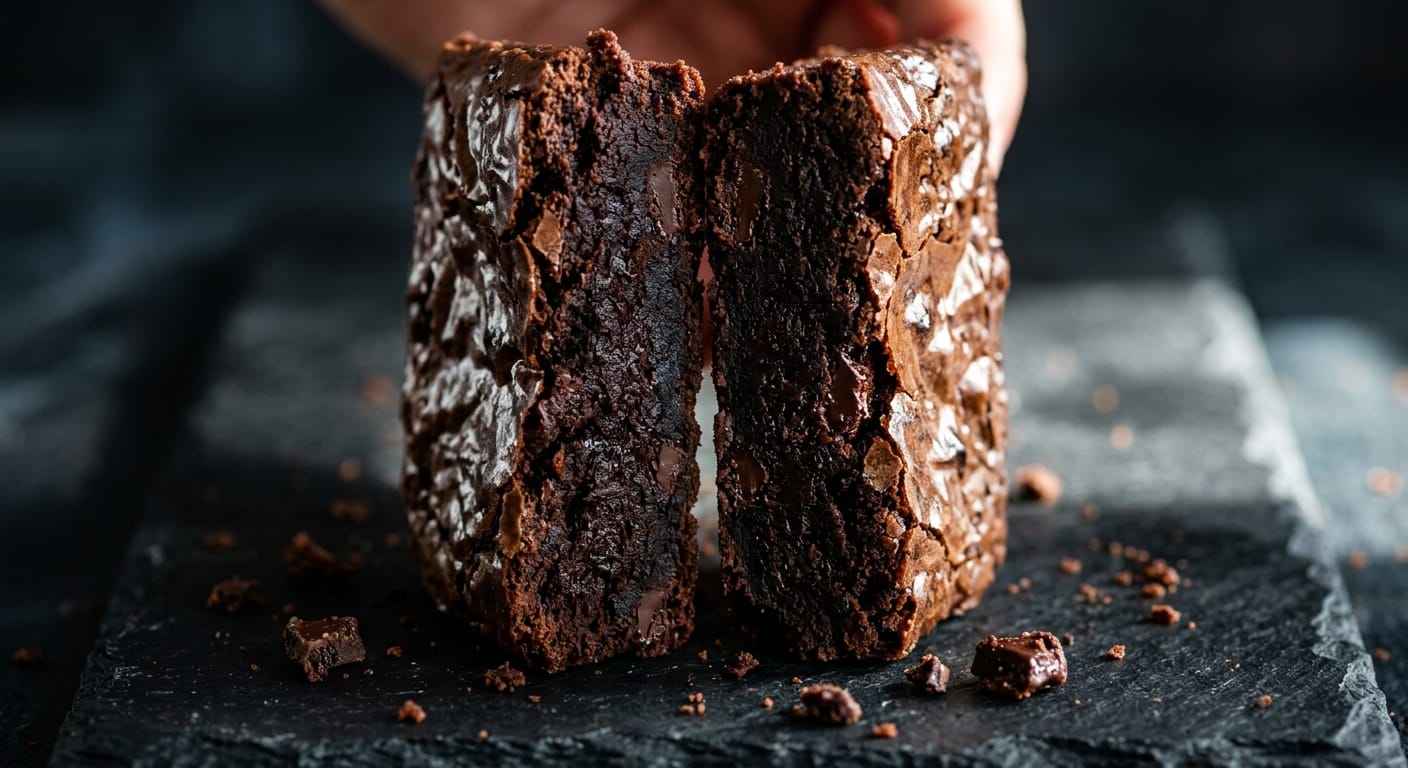
- Two sources of chocolate, not one. Melted dark chocolate brings fat and depth. Dutch-process cocoa brings a darker, mellower intensity. Stirring chips in at the end is not double fudge, this is.
- Butter instead of seed oil. Grass-fed butter gives you a richer, denser crumb than canola or vegetable oil ever could, without sacrificing the fudgy pull you're after.
- Coconut sugar over refined white sugar. It melts into the batter with a slight caramel undertone that deepens the chocolate rather than competing with it. The brownies bake a shade darker, which is exactly what you want.
- The whipping step is not optional. Beating the eggs and sugar for a full two to three minutes creates the signature crackly top. Skipping it or rushing it is the single most common reason brownies come out looking matte and dense.
- Doneness is a visual cue, not a timer. A toothpick one inch from the edge should come out with moist crumbs. The center should still have a slight jiggle when you nudge the pan. Pull it at that moment and not a second later.
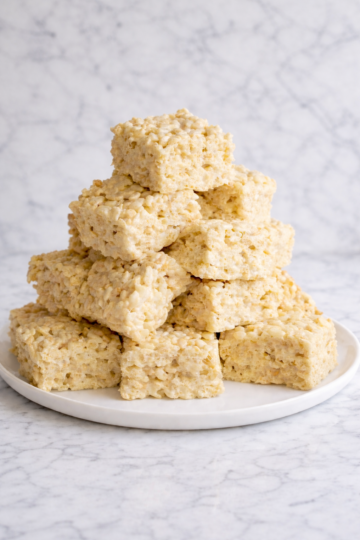
Double Fudge Brownies
Prep time: 15 minutes Cook time: 30 minutes Servings: 16 brownies
Ingredients
Chocolate Base
- 4 oz (115g) dark chocolate, 70% cacao or higher, roughly chopped (use a bar, not chips)
- 10 tablespoons (140g) grass-fed butter, cut into pieces
- 3 tablespoons (18g) Dutch-process cocoa powder
Batter
- 3 large pasture-raised eggs, room temperature
- 1 cup (180g) coconut sugar
- 1 teaspoon pure vanilla extract or vanilla paste
- 1 cup (125g) all-purpose flour
- ½ teaspoon fine sea salt
Directions
Heat the oven to 325°F (165°C). Line an 8×8 inch baking pan with parchment paper, leaving enough overhang on two sides to lift the brownies out cleanly. Lightly butter any exposed pan edges.
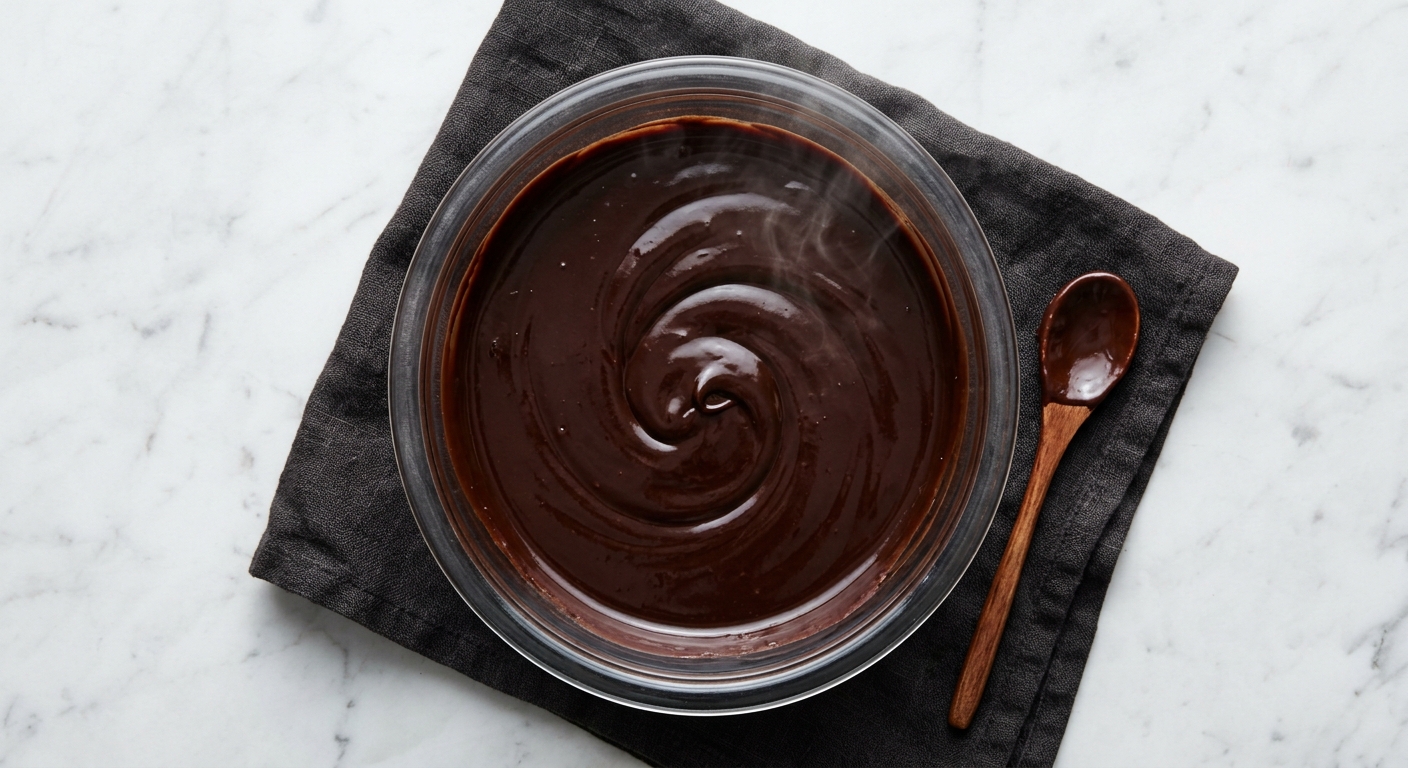
Melt the chocolate and butter together in a heatproof bowl set over a pot of barely simmering water, stirring occasionally until smooth and glossy. Remove from the heat. Sift in the cocoa powder and stir until fully absorbed and the mixture looks like a very dark, thick ganache. Set aside to cool for five minutes.
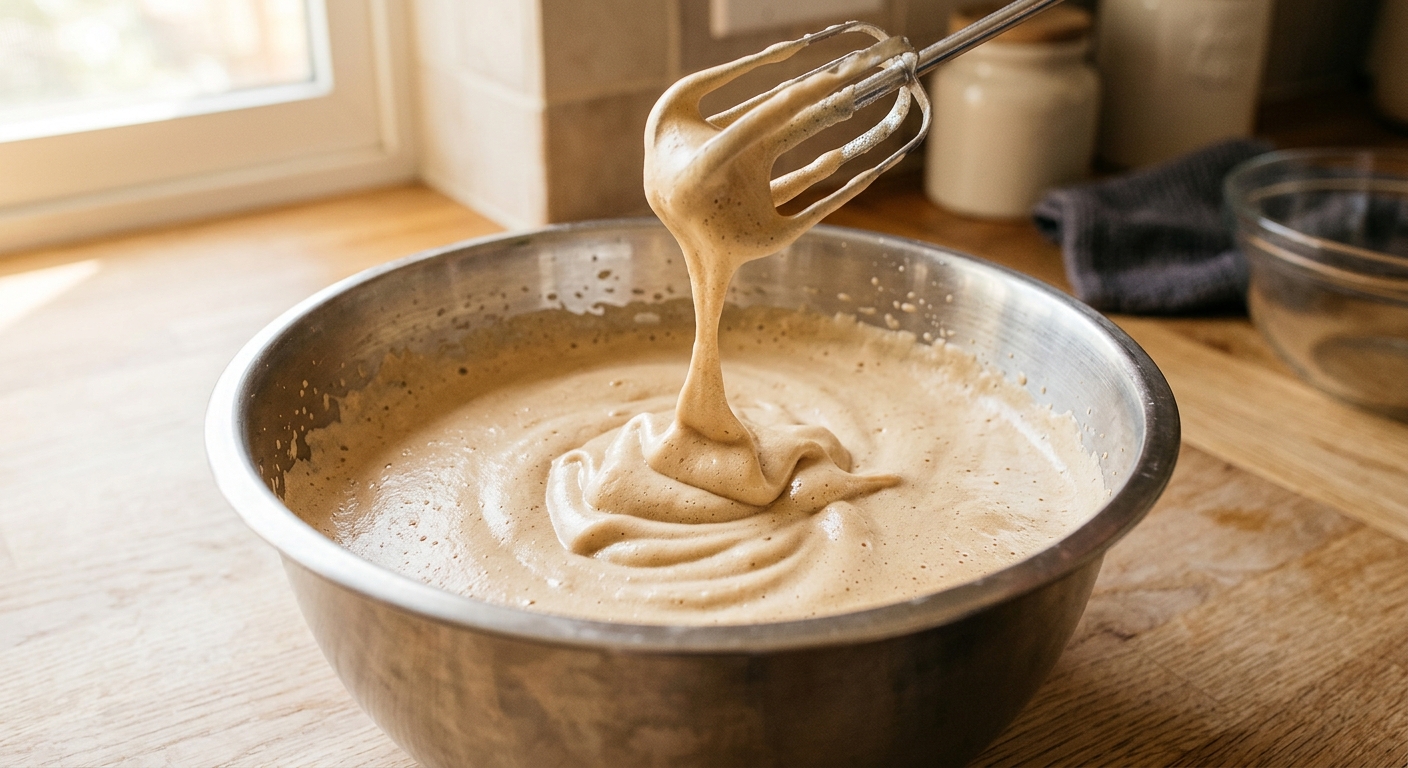
Whip the eggs and coconut sugar in a large bowl using a hand mixer or stand mixer on medium-high speed for a full two to three minutes. The mixture should roughly double in volume and turn pale, almost coffee-colored, leaving a thick ribbon when you lift the beater. (This is the step most people rush and then wonder where their crackly top went.)
Add the vanilla to the egg mixture and beat for another ten seconds to combine.
Pour the chocolate mixture into the whipped eggs in a slow, steady stream, folding with a rubber spatula as you go. Keep folding until no streaks remain and the batter is glossy and uniform.
Fold in the flour and salt in one addition. Switch to a spatula and fold gently, using wide strokes along the bottom of the bowl. Stop the moment the last streak of flour disappears. Overmixing here is how fudgy becomes cakey.
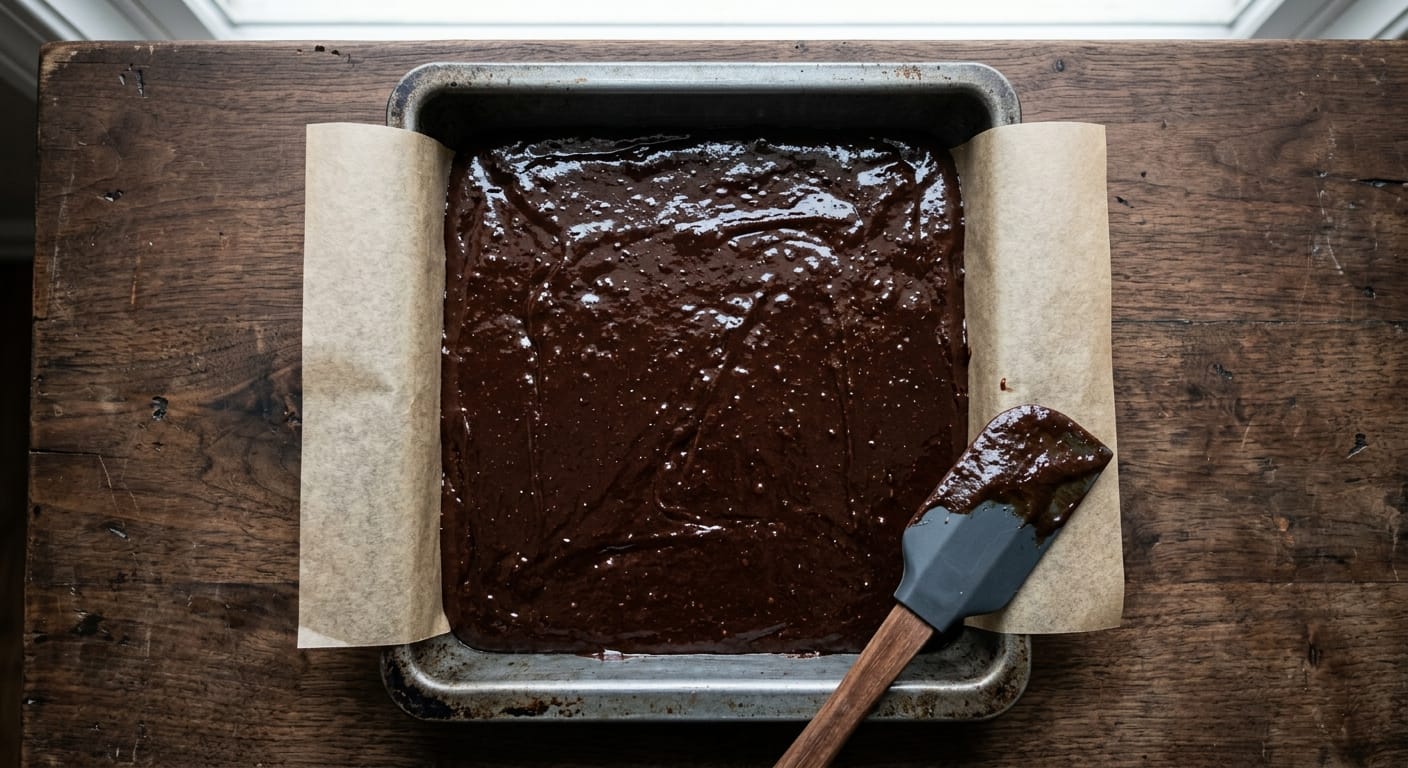
Pour the batter into the prepared pan and spread it into an even layer, taking it all the way to the corners. Tap the pan once on the counter to settle it.
Bake for 28 to 32 minutes. At the 28-minute mark, insert a toothpick about one inch from the edge. It should come out with moist, fudgy crumbs and nothing wet. The center of the pan should have a slight jiggle when you nudge it. If the toothpick comes out completely clean, you've gone a few minutes too long. Pull when there's still some give in the middle and trust the cooling process to finish the job. Keep an eye on the color in the final five minutes since coconut sugar darkens faster than white sugar.
Cool in the pan on a wire rack for at least 45 minutes at room temperature. Then transfer the whole pan to the refrigerator for 20 minutes. Use the parchment overhang to lift the brownies onto a cutting board. Run a sharp knife under hot water, dry it completely, and slice. Repeat the hot-dry-knife step between cuts. This is what gives you the clean, glossy edges in the photos.
Notes
Storage: Brownies keep at room temperature in an airtight container for up to 4 days. For cleaner slices each time, store them in the refrigerator and let them sit out for 10 minutes before eating. They freeze well for up to 3 months. Wrap individual squares in plastic wrap and store in a freezer bag. Thaw at room temperature for about an hour.
On the chocolate: Use a chopped chocolate bar with 70% cacao or higher for the melted component, not chocolate chips. Standard chips contain stabilizers that affect how they emulsify into the batter. A Lindt, Valrhona, or Endangered Species bar all work. Whatever you use, chop it so it melts evenly.
On the cocoa: This recipe uses Dutch-process cocoa. It's less acidic than natural cocoa and produces a darker, more mellow chocolate flavor that plays well with the coconut sugar. Natural cocoa will change both the flavor and the rise, so if that's what you have, the result will be slightly different.
On the fat: If you want a chewier texture, swap half the butter for refined coconut oil (not virgin, which has a distinct coconut flavor). Use the same total weight of fat. The butter-coconut oil blend gives you a slightly firmer bite when cold.
On the cooling protocol: The 45-minute room temperature rest followed by 20 minutes in the refrigerator is not precious, it's the difference between brownies that hold their shape and ones that smear across the board. The interior continues to set as it cools. Cut too early and the fudgy center you worked for ends up on the knife.
FAQ
What makes brownies fudgy instead of cakey? Fat ratio and flour quantity. Fudgy brownies use more fat relative to flour and rely on melted chocolate rather than cocoa powder alone. Using butter instead of oil adds richness, and keeping the flour amount low means there's less structure to turn the crumb airy. The egg whipping step also matters: whipped eggs add lift and a crackly top without pushing the texture into cake territory.
Why don't my brownies have a crackly top? The crackly top comes from beating the eggs and sugar long enough to dissolve the sugar and incorporate air into the mixture. Most recipes say "beat until combined," which sounds like thirty seconds of work. It's closer to two to three minutes at medium-high speed. If you under-whip, the top bakes up matte and soft instead of shiny and crinkled.
Can I use cocoa powder instead of melted chocolate in brownies? You can, but you'll lose both the fat and the depth that melted chocolate brings. Cocoa powder alone produces a sharper, drier flavor. This recipe uses both for a reason: the melted dark chocolate builds richness and a glossy batter, while the cocoa powder layers in a more intense, concentrated chocolate note. Cutting the melted chocolate out shifts the texture noticeably toward cakey.
How do I know when brownies are done baking? Ignore the timer and use the toothpick test at the edges, not the center. A toothpick inserted one inch from the edge of the pan should come out with moist crumbs. The center should still have a slight jiggle when you nudge the pan. A clean toothpick means they've gone too far. A wet toothpick means they need another two to three minutes. Pull them when they're between those two points and let the cooling time do the rest.
Can I substitute butter for oil in brownies? Yes, and in this recipe it's not a substitution, it's the whole point. Butter gives you a richer, more complex fat than canola or vegetable oil, and it doesn't compromise the fudgy texture. If anything, it improves it. Use melted grass-fed butter at the same weight as any oil the original recipe calls for.
Leave a Reply